Guides
Add a store
For site owners on Particle or Wave who want to sell. Connect your own Stripe account, add a product, and take a test order from checkout to shipped.
Needs Particle · 10 minutes
Before you start
- A site on Particle or Wave. On Zero-Point the Store tab offers the move to Particle instead. See Plans and billing.
- You are the site's owner. Managers can see the store and the orders, but only the owner connects Stripe or changes store settings.
- A Stripe account, or ten minutes to make one. Stripe asks for your legal or business name, a bank account for payouts, an address and a phone number.
If you are starting from nothing, Pick a store template builds a site with a shop section and sample products. Then come back here.
1. Open Store
Open your site and pick Store in the sidebar. Before anything is connected, the tab holds one card with a Connect Stripe button.

The card states that payments go straight to your Stripe account and nertia takes no cut. The tab has three views: Connection, Products and Orders.
2. Connect Stripe
Press Connect Stripe and finish on Stripe. Sign in to an account you have or create one, answer Stripe's questions, and Stripe sends you back to the Store tab.

nertia uses Stripe Connect, and the account is yours. Payments land in your Stripe balance, and payouts, disputes, receipts and tax reports stay in your Stripe dashboard. nertia never sees your answers to Stripe.
| Badge | Meaning | What to do |
|---|---|---|
| Ready | Stripe can take payments | Nothing. The Store settings card is below |
| Setup not finished | Stripe still needs a detail or a document | Continue setup |
| Test mode | The store runs on Stripe's test keys | Test cards work, real cards do not. See the go live checklist |
Pressing Connect Stripe also opens the store on the draft: the product, cart and order pages are added, and the header gains a cart control. Under Store settings, set where you ship and what it costs, then press Save. Set shipping and tax has every field.
3. Add a product
Pick Products, press Add product, and fill in a name, a price and a sentence. Press Create product and it is live, with no publish needed.


| Field | Notes |
|---|---|
| Name | What the shopper sees on the card and the product page |
| Slug | The product's address, /product/{slug}. Filled from the name |
| Price | In US dollars, like 14 or 12.50 |
| Compare at price | Optional. Shown struck through beside the price |
| Image URL | A link to the main photo. Upload it under Media first and copy its address |
| Category and Tags | Group and filter products in the grid |
| In stock | Off reads Sold out, and checkout refuses the line |
| Featured | Pins the product to the front of the grid |
Leave Stripe Payment Link and External product URL blank. They are for a product sold somewhere else.
Press Add product on the Products view, fill the form, press Create product.
4. See the store pages
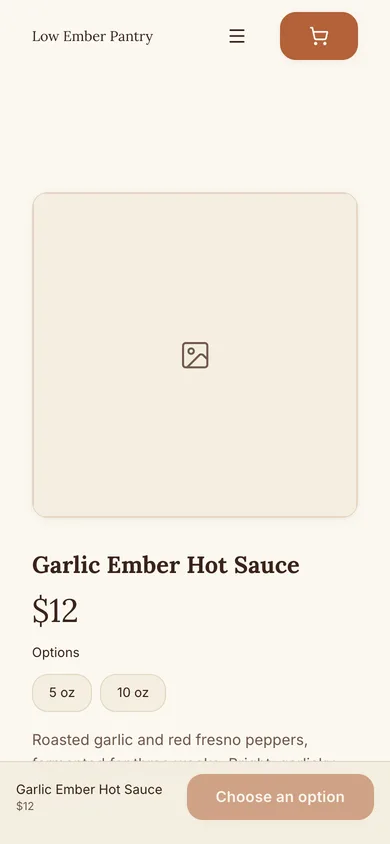
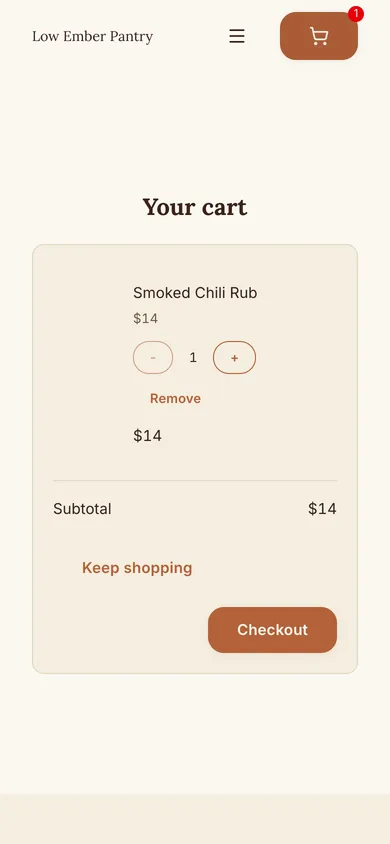
Open your site and go to a product. The store added three pages, each kept out of the nav.


| Page | Address | What it shows |
|---|---|---|
| Product | /product/{handle} | Gallery, description, variant picker, Add to cart |
| Cart | /cart | Your cart: the lines, quantities, Subtotal and Checkout |
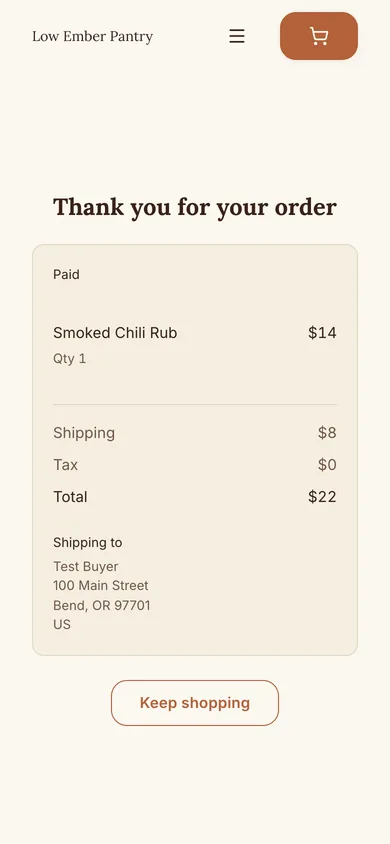
| Order | /order/{id} | The receipt the shopper lands on after paying |
On a product with variants the button reads Choose an option until the shopper picks one. The cart re-reads every price from your product list, so a change you made shows at once. The pages go live the next time you press Publish in the editor. See Publish.
5. Place a test order
Add something to the cart, press Checkout, and pay on Stripe Checkout with a test card. Stripe sends you back to the order page.

| Field | Value |
|---|---|
| Card number | 4242 4242 4242 4242 |
| Expiry | Any date in the future |
| CVC | Any three digits |
| Name, email, address | Anything in a country you ship to |
The order page shows the lines, shipping, tax, total, Shipping to and the status, Paid. Anyone with its link can read it, so it needs no sign-in. An email with the lines and the address goes to your Order email, and the payment sits in your Stripe test dashboard under Payments. Test payments cost nothing.
6. Find it under Orders
Pick Orders on the Store tab. Every paid order is there, newest first, and the new one reads To ship.

| Status | Meaning |
|---|---|
| To ship | Paid, waiting for you |
| Shipped | You marked it shipped |
| Refunded | Refunded in Stripe. See Refunds |
| Needs attention | Payment confirmed but the order could not be completed. Check the payment in Stripe |
The Status filter narrows the table. Press a customer's name to open the order: the lines, Subtotal, Shipping, Tax, Total, Ship to and Customer email. All orders goes back.

Pick Orders on the Store tab. Use the Status filter for To ship.
7. Mark it shipped
Pack the order, press Mark shipped, pick the carrier and type the tracking number. Press Mark shipped in the form and the shopper gets an email with the tracking link.

- Carrier is USPS, UPS, FedEx or DHL, and nertia builds the tracking link itself. Other adds a Carrier name and an optional Tracking link.
- The status flips to Shipped, and a note says "Marked shipped. We emailed the customer." The email comes from your site's name, and replies go to your Order email.
- To fix a typo, open the order again and press Update tracking. The shopper gets a second email with the new link.
Open the order, press Mark shipped, fill the form, press Mark shipped.
Done
The test order reads Shipped under Orders, and the shopper has an email with the tracking link. Payments go into your own Stripe account. Next: connect your own domain, or read more on your store: shipping and tax, refunds, the go live checklist and Printful.
Problems
- Connect Stripe says "Stripe is not set up for stores yet." nertia's live Stripe switch is off, so stores run in test mode for now. See the go live checklist.
- The store refuses to open because a page slug is taken. One of your pages is at
/product,/cartor/order. Rename it under Pages in the editor, then press Connect Stripe again. - The shopper sees "This store is not open yet." The store opened after your last publish. Publish again.
- The badge stays on Setup not finished after you finished on Stripe. Reload the Store tab. It asks Stripe for the current status on every visit.